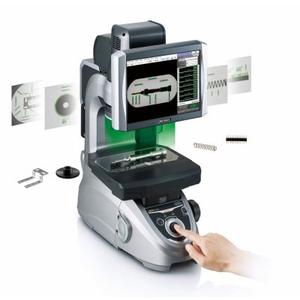
Equipped with a probe, the Keyence IM6225-T digital profile projector extends its non-contact 2D measurement capabilities to measurements of heights and depths.
The range of Keyence's profile projectors has expanded over the years and has expanded its range of functionality and measurement tools to offer the most appropriate response to the specific needs of each manufacturer.
It is enriched even today with the launch of the model IM6225-T which accesses 3D measurement.
The latter is in fact equipped with a probe which makes possible measurements of the height of parts in addition to the 2D measurements. And this in all simplicity.
Once the 2D measurements (in X and Y) are made without contact by optical imaging, the combined movements of the plate on which the workpiece to be controlled in the X direction and that of the probe in the Y and Z direction allow all sorts of measurements In Z over a range of 60 mm: height of part, depth of drilling / countersink etc ...
The part to be checked is identified automatically by the camera of the IM which then controls the displacements to ensure probing of the points designated by the program. The programming of the Z measurement sequences is simply carried out graphically as is already the case for 2D measurements. A specific tool has been integrated into the programming software to designate the probing points of the workpiece to be checked.
The Z-measurements are made automatically by an interchangeable stylus (flat or spherical end) mounted on a magnetic base. Depending on the area to be covered, two stylus positions are available. The measuring accuracy is ± 15 m on a measuring range of 95 × 95 mm and reaches ± 7.5 m on a measuring field of 95 × 45 mm.
The Keyence IM6225-T digital projector has been expanded with new measurement capabilities while still being easy to use.
Its ability to measure heights and depths accentuates its versatility since it is now able to handle measurements made by comparators and other columns of measurements.
Manufacturers will thus be able to simplify their ranges and increase productivity. At the same time, the number of instruments connected to SPC systems will be considerably reduced.
